The HPE Juniper EX Switch Series is a portfolio of high-performance Ethernet switches designed for enterprise branch offices, campuses, and data centers. Running the unified JunOS, they provide robust Layer 2 and Layer 3 capabilities. The platform is heavily integrated with MistAI and cloud management for simplified operations and AI-driven automation.
HPE Aruba ClearPass is a comprehensive Network Access Control (NAC) and policy management platform that enforces Zero Trust security. It determines who and what connects to your network, enforcing strict role- and device-based access policies across any wired, wireless, and VPN infrastructure, regardless of the vendor.
Introduction and Overview
This guide walks through configuring an EX switch to authenticate against ClearPass Policy Manager using the secure 802.1X authentication standard.
Some items will be assumed. ClearPass and the EX switch are up, healthy, and have already established two-way communication between the two systems. The configuration of the switch will be completed from the MistAI platform. Basic ClearPass navigation and configuration knowledge is assumed. Configuration of the wired supplicant is not included in this guide.
Configuration of the EX Switch
There are a few ways this can be done. Highlighted here is the use of Switch Templates. Switch Templates are a configuration paradigm where one creates a template of a configuration, and applies it at scale. After the template is deployed, portions of the configuration can then be overridden at the device level. Think common settings such as DNS, NTP, VLAN definitions, etc. At the device level, IP Addresses, Static routes, Hostnames, etc. can be configured.
Templates can be deployed at the Organization or the Site level. Templates provide the administrators the benefit of avoiding configuration sprawl and user error, to name a few.
Getting Started in HPE Juniper Mist
Login to Mist and navigate to Organization -> [Wired] -> Switch Templates
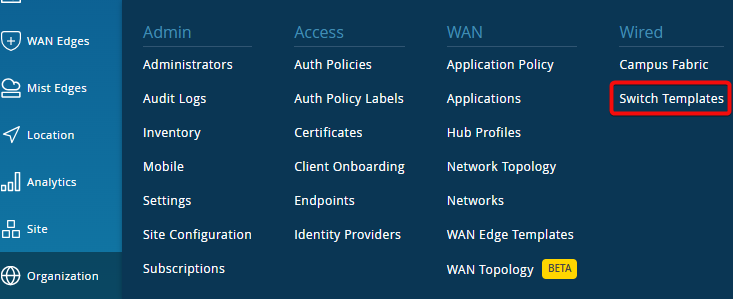
From here a screen will be presented that shows existing switch templates. The ability to Import or Create a new template also exists. For this guide a new template named guide-template will be created.
Within the template the minimal necessities will be configured to get the solution running. Enhancements and references for additional features are provided in the appendix of this guide.
Authentication Settings
The authentication server definition must be configured so the switch knows where and how to communicate with ClearPass.
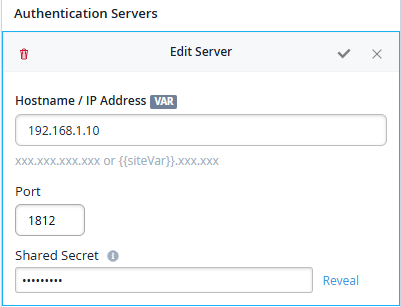
Additional servers can be added here. Click Add Server to configure them. Optionally, enable the Load Balance feature.
By default, EX switches use the first radius server. This option randomizes the configuration of the order of servers on per switch basis, by which we provide load balancing across multiple radius servers.
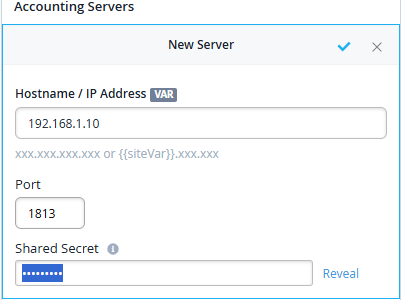
Accounting Servers are not technically required for this solution but it is good practice to enable accounting. Accounting is used, in a RADIUS deployment, to track client network usage. The accounting server is also the authentication server, typically.
Next, configure NTP and DNS servers. Again, not necessarily a prerequisite, but it is good practice for keeping accurate logs.
NOTE: It is best practice to set your server’s definition using DNS FQDNs. This allows you to quickly update referenced IP addresses by just adjusting the DNS A record to point to different IPs. There are other reasons outside the scope of this guide, as well. This is true for authentication, accounting, and NTP.
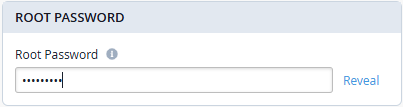
Next set a root password.
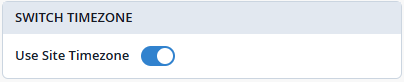
Set the switch time zone.
Configuring Shared Elements
First, define a network that the client will ultimately use.
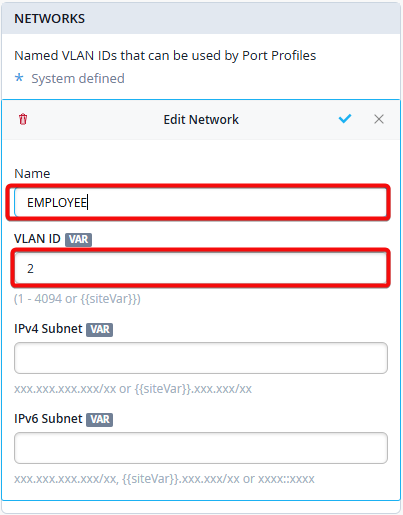
Save this by clicking the checkbox in the top right of the New Network box.
Next move to the Port Profiles section and click Add Profile.
- Name: dot1x-port
- Port Enabled: Enabled
- Use dot1x authentication: Checked
- Dynamic VLAN: Click the + to add our previously configured network.
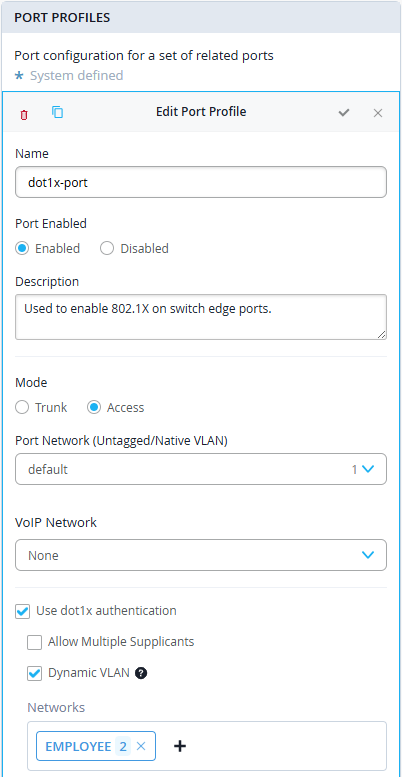
This is all that is required for the Port Profile to allow authentication. Click the checkbox at the top of the dot1x-port configuration window to save the changes.
Configuring Switch Policies
A Switch Policy uses a RADIUS based filter to filter traffic. The enforcement of each policy happens via the RADIUS server. These filters are supported on all EX Series switches that authenticate users through the RADIUS server. After adding RADIUS firewall filters, make note of the IDs. They will be needed to create the switch policies in the Juniper Mist portal.
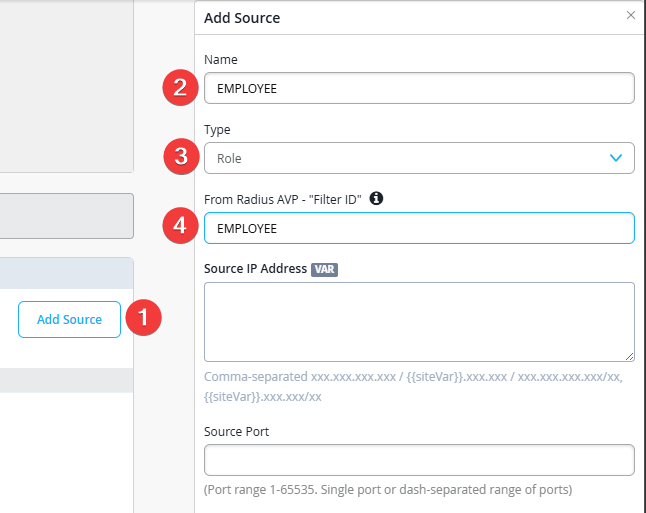
To configure a source, click the Add Source button in the Source table.
Configure a name for the source, the type as “Role” and use EMPLOYEE as the “From RADIUS AVP”. The latter value will be what the switch uses to determine the role that the user will be assigned. In this case the RADIUS server will send back Filter-ID=EMPLOYEE which will assign the Role EMPLOYEE.
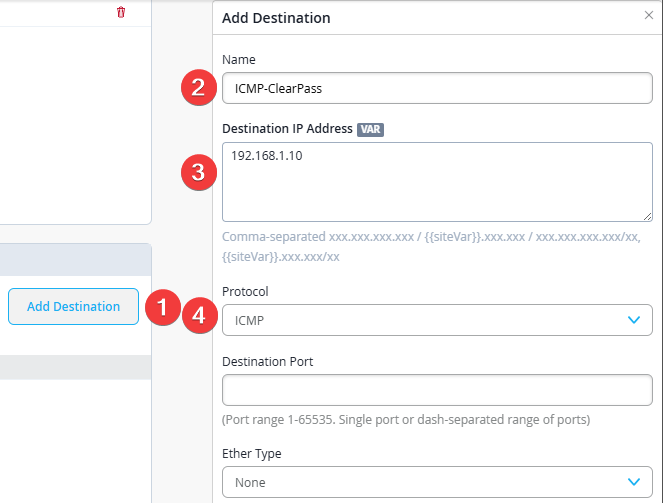
To configure a destination, click the Add Destination button in the Destination table. For demonstration purposes the destination will be kept simple and will block ICMP to ClearPass within the demo environment.
To configure a switch policy, click the Add Switch Policy button in the Switch Policy table. This will add a new row in the policy. Name it appropriately, select the source as the newly created Source: “EMPLOYEE”. Add the destination as the newly created Destination “ICMP-ClearPass”, add a second Destination “All Destinations”.
Initially, when a destination is added, the default action is set to allow. So, ICMP-ClearPass will be green. To set a deny action, click the center of the destination and you will get a tooltip like the one below will appear:
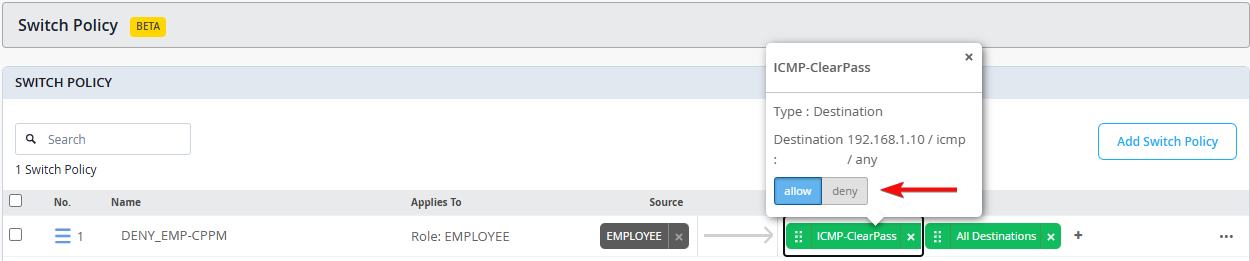
Select deny to apply the deny action for that destination.
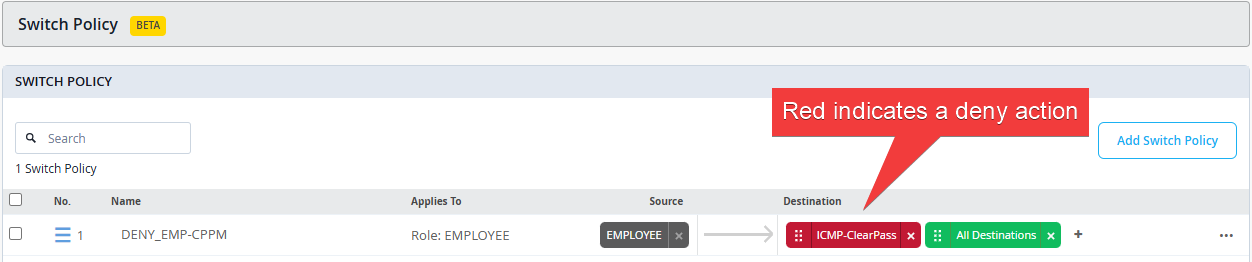
Once that is done, the switch template configuration is complete. Scroll to the top of the page and click Save.
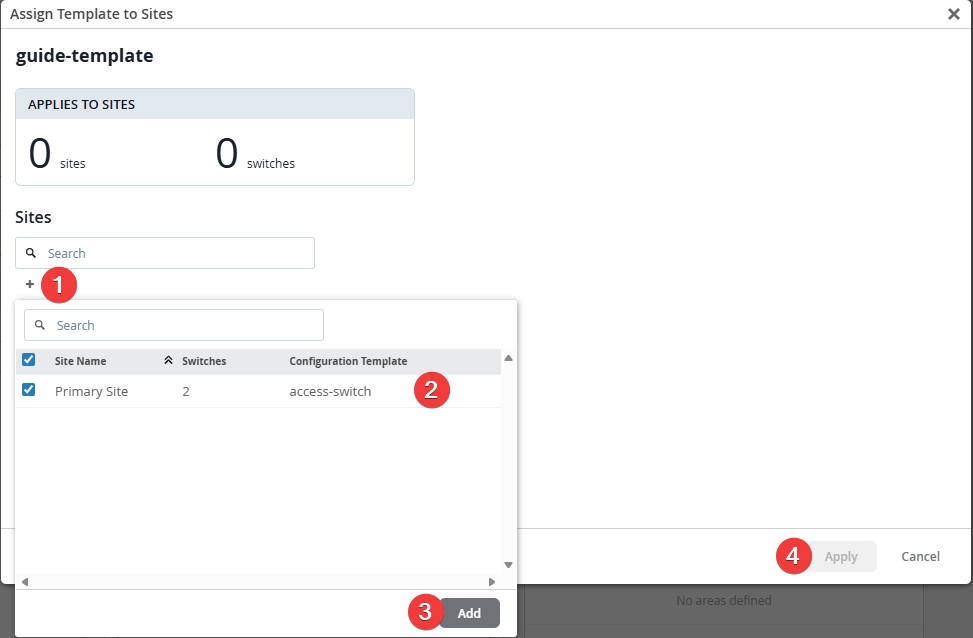
Assign Template to a Site
At the top of the template configuration page click the Assign to Sites button.
Configure the Switch
In this section the switch port that will be performing 802.1X must be configured.
Navigate to Switches in the sidebar. Select a switch.

In this guide mge-0/0/0 will be utilized for client authentication. Select mge-0/0/0 in the faceplate view. Select Modify Port Configuration to open the port’s configuration window. Select the configuration Port Profile created earlier. Select the checkbox to save.
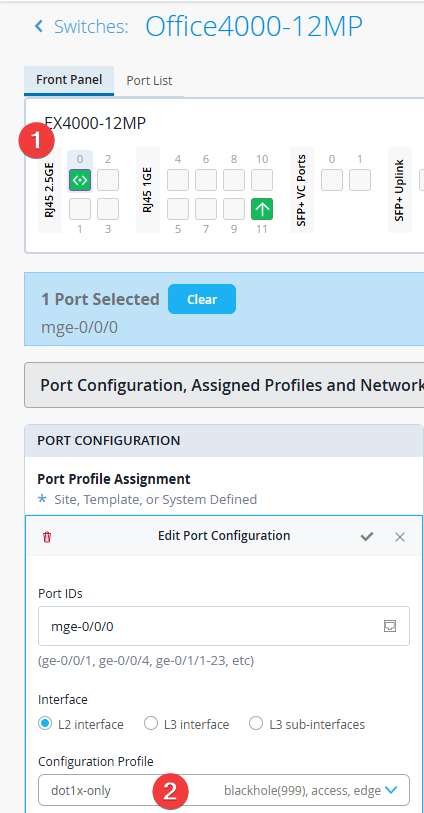
The Mist portion of the configuration is now complete.
Configuring ClearPass
There is assumed knowledge in this guide that the reader has basic CPPM configuration experience. The guide will cover basic steps to complete the integration with Mist.
Open CPPM and navigate to Configuration -> Enforcement -> Profiles. Click Add

Select the Template: “Filter ID Based Enforcement”. Name the Profile Appropriately. Navigate to the Attributes Tab.
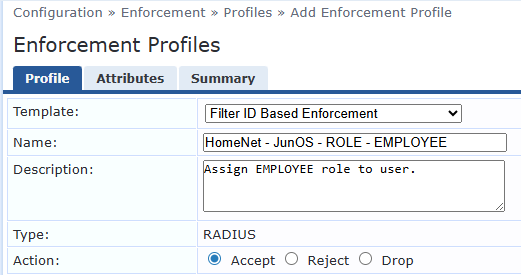
Modify the Value of the Filter-ID to EMPLOYEE

Next the conditions must be added to the appropriate Service and Enforcement Policy. Below is an example.
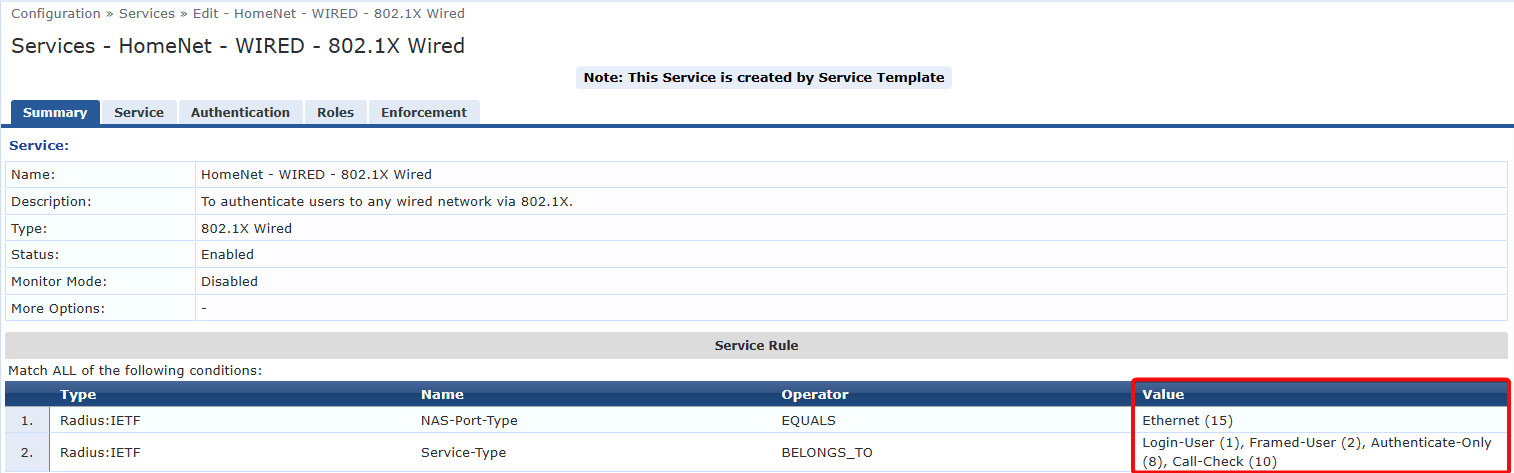
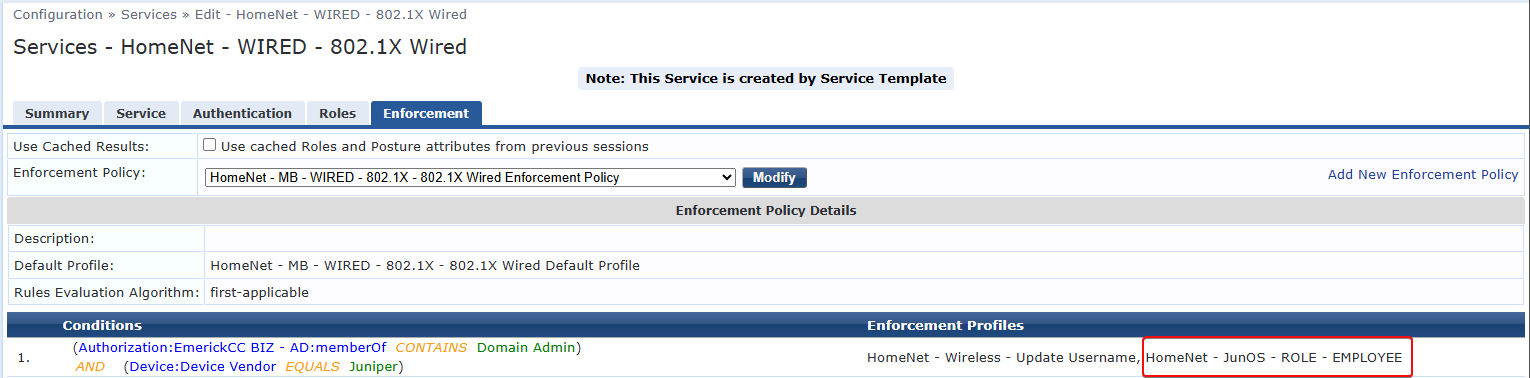
ClearPass Policy configuration is complete.
Validation
This section will include steps on how to validate the configuration and deployment.
JunOS Configuration
Show Switch Policy
root@Office4000-12MP> show configuration firewall | display inheritance no-commentsfamily ethernet-switching { filter EMPLOYEE { term 01 { from { destination-prefix-list { 192-168-1-10_32; } ip-protocol icmp; } then { discard; count EMPLOYEE_01; } } term 02 { then { accept; count EMPLOYEE_02; } } }}Show 802.1X users
root@Office4000-12MP> show dot1x interface802.1X Information:Interface     Role           State           MAC address          Usermge-0/0/0.0   Authenticator  Authenticated   0C:37:96:0B:A5:70    zemUser
{master:0}root@Office4000-12MP> show dot1x interface detailmge-0/0/0.0  Role: Authenticator  Administrative state: Auto  Supplicant mode: Single  Number of retries: 3  Quiet period: 60 seconds  Transmit period: 30 seconds  Mac Radius: Disabled  Mac Radius Restrict: Disabled  Reauthentication: Enabled  Reauthentication interval: 65000 seconds  Supplicant timeout: 30 seconds  Server timeout: 30 seconds  Maximum EAPOL requests: 2  Guest VLAN member: not configured  Last Mac-Learn Request: 0c:37:96:0b:a5:70  Last Mac-Learn Time: 2026-05-27 11:29:31.824688  Number of connected supplicants: 1    Supplicant: anonymous, 0C:37:96:0B:A5:70      Radius supplicant: zemUser              <--------      Operational state: Authenticated      Backend Authentication state: Idle      Authentication method: Radius      Authenticated VLAN: EMPLOYEE            <--------      Dynamic Filter: EMPLOYEE                <--------      Session Reauth interval: 65000 seconds      Reauthentication due in 60131 seconds      Session Accounting Interim  Interval: 600 seconds      Accounting Update  due in 531 seconds      Eapol-Block: Not In Effect      Domain: Data
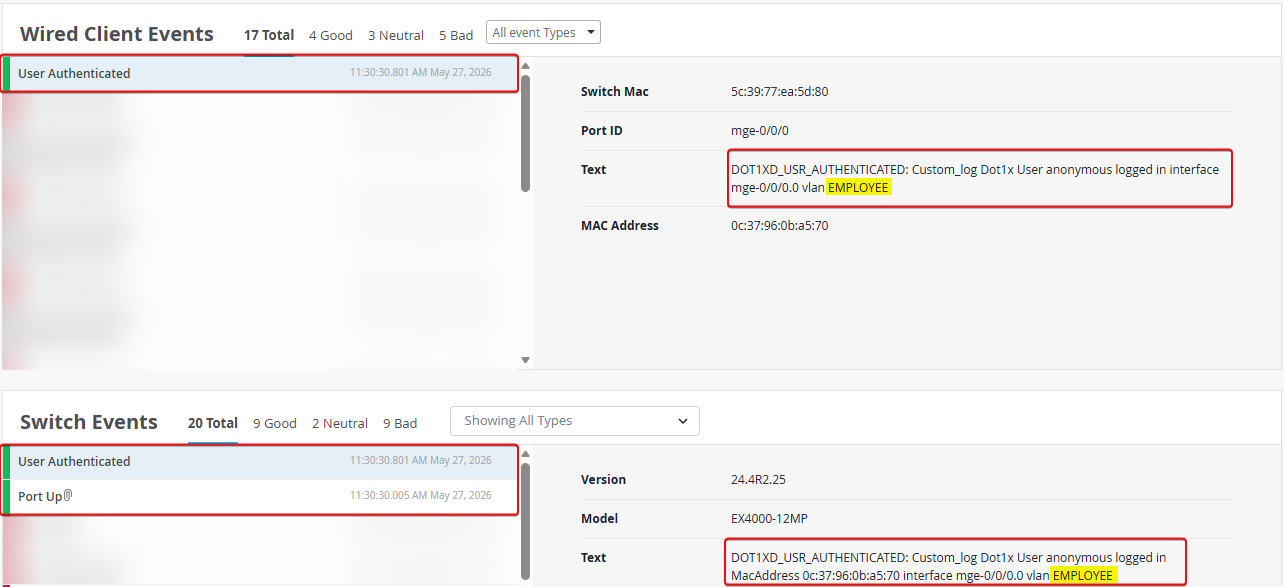
Mist Verification
Navigate to Clients -> Wired Clients

Drill into Client from previous screenshot.
ClearPass Verification

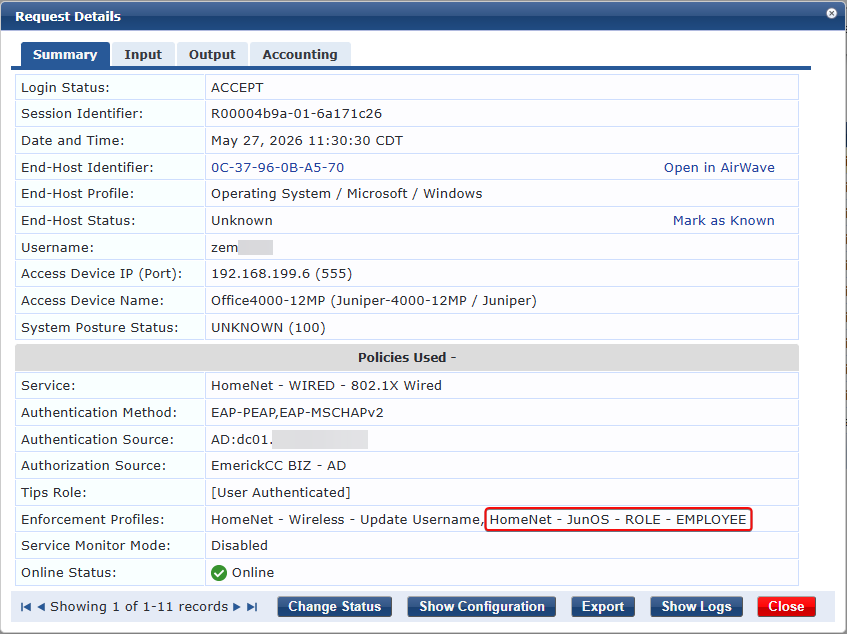
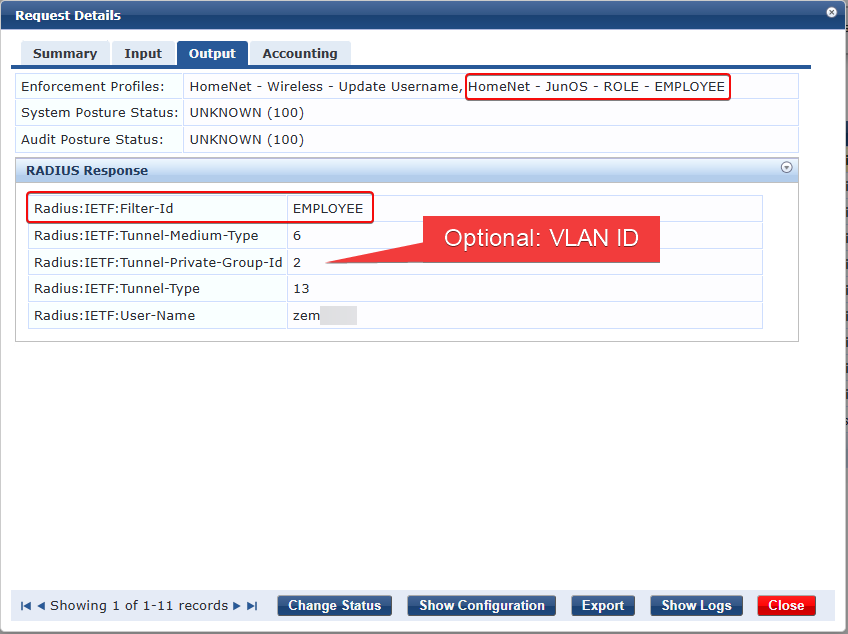
Client Verification
>ipconfigIPv4 Address. . . . . . . . . . . : 192.168.2.136
PS C:\> ping -S 192.168.2.136 1.1.1.1
Pinging 1.1.1.1 from 192.168.2.136 with 32 bytes of data:Reply from 1.1.1.1: bytes=32 time=10ms TTL=56
Ping statistics for 1.1.1.1:    Packets: Sent = 1, Received = 1, Lost = 0 (0% loss),
PS C:\> ping -S 192.168.2.136 192.168.1.10
Pinging 192.168.1.10 from 192.168.2.136 with 32 bytes of data:Request timed out.
Ping statistics for 192.168.1.10:    Packets: Sent = 1, Received = 0, Lost = 1 (100% loss),
PS C:\>
ICMP Successfully blocked to 192.168.1.10
Appendix
802.1X Authentication | Junos OS | Juniper Networks
IEEE 802.1X standard for port-based network access control and protects Ethernet LANs from unauthorized user access. It blocks all traffic from a supplicant (client) at the interface until the supplicant’s credentials are presented and matched on the authentication server (a RADIUS server). When the supplicant is authenticated, the switch stops blocking access and opens the interface to the supplicant. Read this topic for more information.
Switch Policies | Mist | Juniper Networks
To ensure more granular control over network access, you can now create switch policies, which act as access control lists (ACLs) for your Juniper Mist-managed switches. You can use port profile-based and RADIUS-based policies.
Dynamic VLAN Assignment for Colorless Ports | Junos OS | Juniper Networks
Enterprises typically have a variety of users and endpoints, which results in multiple use cases that need to be addressed by their policy infrastructure. The policy infrastructure should enable any supported user device to connect to any port on the access switch and to be authenticated based on the capabilities of the device, the authorization level of the user, or both.
HPE Aruba ClearPass Wired Authentication Guide
HPE Aruba ClearPass Integrations (Official)
HPE Aruba ClearPass Integrations (Semi-Official)