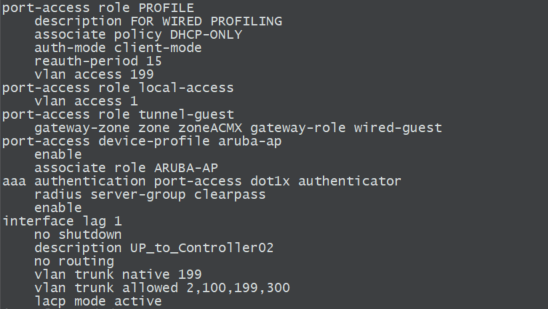
Juniper Mist is a cloud-managed networking platform for wireless access points and EX/QFX switches (among other devices). Configuration at scale is built around templates: WLAN templates for wireless, switch templates for wired. Those templates are meant to be shared. The values that change per site—VLAN IDs, management subnets, DNS, NTP—belong in variables, not in a pile of site-specific template copies.
This guide walks through using Mist device and site variables for wired and wireless only. WAN Edge / SSR is out of scope. The goal is one switch template and one WLAN template that stay identical everywhere, while site-specific values still resolve correctly—and a later template change (RADIUS timeout, port profile, radio settings) still lands at every site.
Official Juniper documentation for the features used here:
- Configure Site Variables
- Configure Switch-Level Variables
- Variables in Device Profiles
- Overview of Template-Based Switch Configuration
Assumptions
- You already have Mist org access and at least two sites (or plan to).
- APs and/or EX switches are claimed and assigned to sites.
- You know how to open WLAN templates and switch templates in Mist.
- You are standardizing on one WLAN template for a shared SSID and one switch template for the common wired design.
- Out of scope: WAN Edge / SSR templates, theme/site branding, and inventing a full IP plan from scratch.
Why variables exist
Templates hold the shared design. Variables hold the differences. If you fork the template per site to hard-code VLAN 100 vs 110, the next org-wide change becomes a merge problem. If instead the template references {{corp_vlan}} and each site defines that name, the template stays one object.
Juniper’s own framing matches that model: one WLAN template, same variable names at each site, different values—see the VLAN example in Configure Site Variables.
Rules of the road (read these once)
Only VAR fields accept tokens
On configuration screens, look for the VAR indicator. Fields with that label accept site or device variables. Juniper documents this tip on the site-variables page.
Syntax
Use double curly braces:
{{variableName}}Letters, numbers, and underscores only. No spaces. No other special characters. Names are case sensitive: {{Mgmt_VLAN}} and {{mgmt_vlan}} are different variables. Pick a convention early—lowercase with underscores works well ({{mgmt_vlan}}, {{site_id}}, {{corp_vlan}}, {{default_gateway}})—and keep it as you roll sites out.
Literal trap
If you type {{variableName}} into a field that does not accept variables, Mist does not substitute it. The string is stored as literal text. You will not get a friendly error; you get a VLAN or address that is wrong because the braces never expanded.
Passphrase
For this guide, do not use the SSID passphrase as a variable example. Do not put {{ }} tokens in PSK/passphrase fields. Stick to fields that clearly show VAR—VLAN ID is the wireless example below.
Configuration: site variables
Step 1: Open Site Configuration
- In the Mist portal, go to Organization → Admin → Site Configuration.
- Select the site.
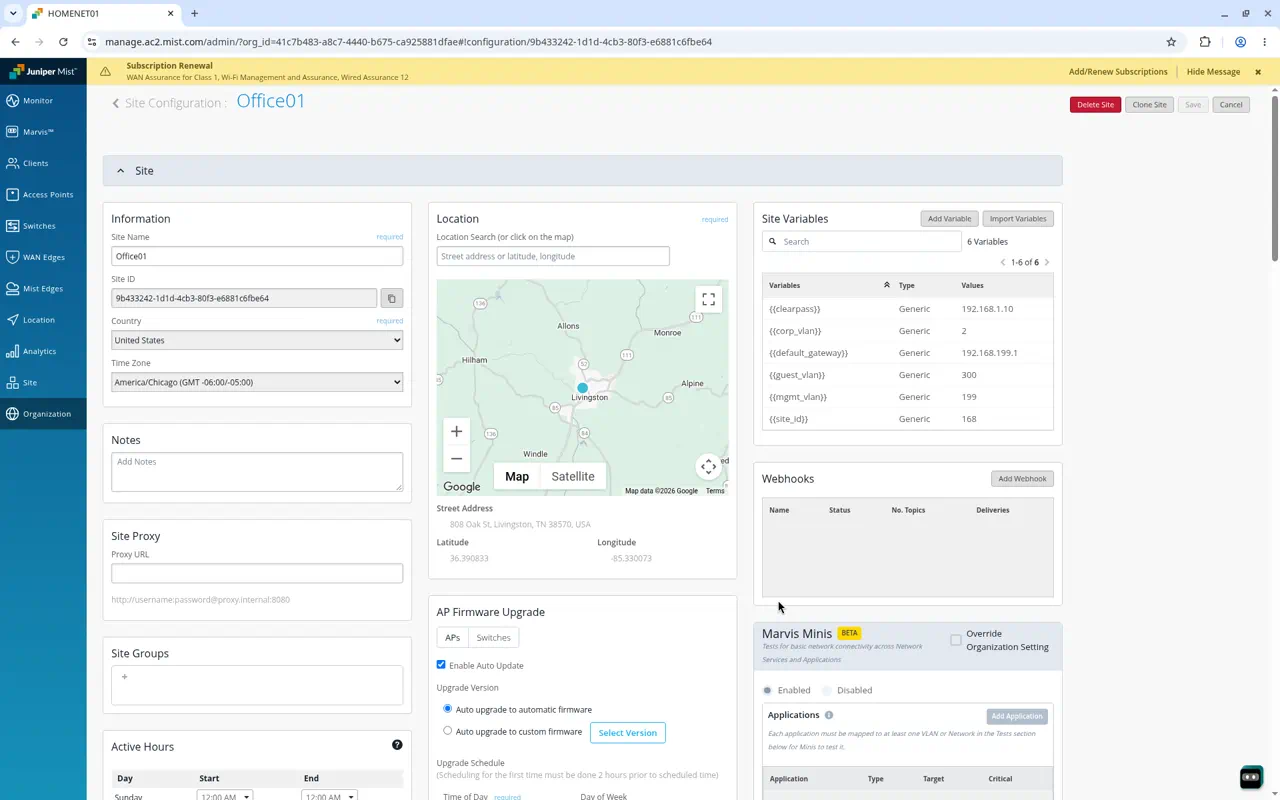
- Scroll to Site Variables.
Step 2: Add or edit variables
In Site Variables, click Add Variable for a new name, or click an existing row to edit. For each row:
| Field | What to enter |
|---|---|
| Variable | Name in braces, e.g. {{corp_vlan}} |
| Value | Site-specific value, e.g. 2 |
| Note | Optional reminder (site nickname, allocation notes) |
A practical starter set for multi-site rollouts:
{{site_id}}{{corp_vlan}}{{mgmt_vlan}}{{default_gateway}}{{dns_1}}{{ntp_1}}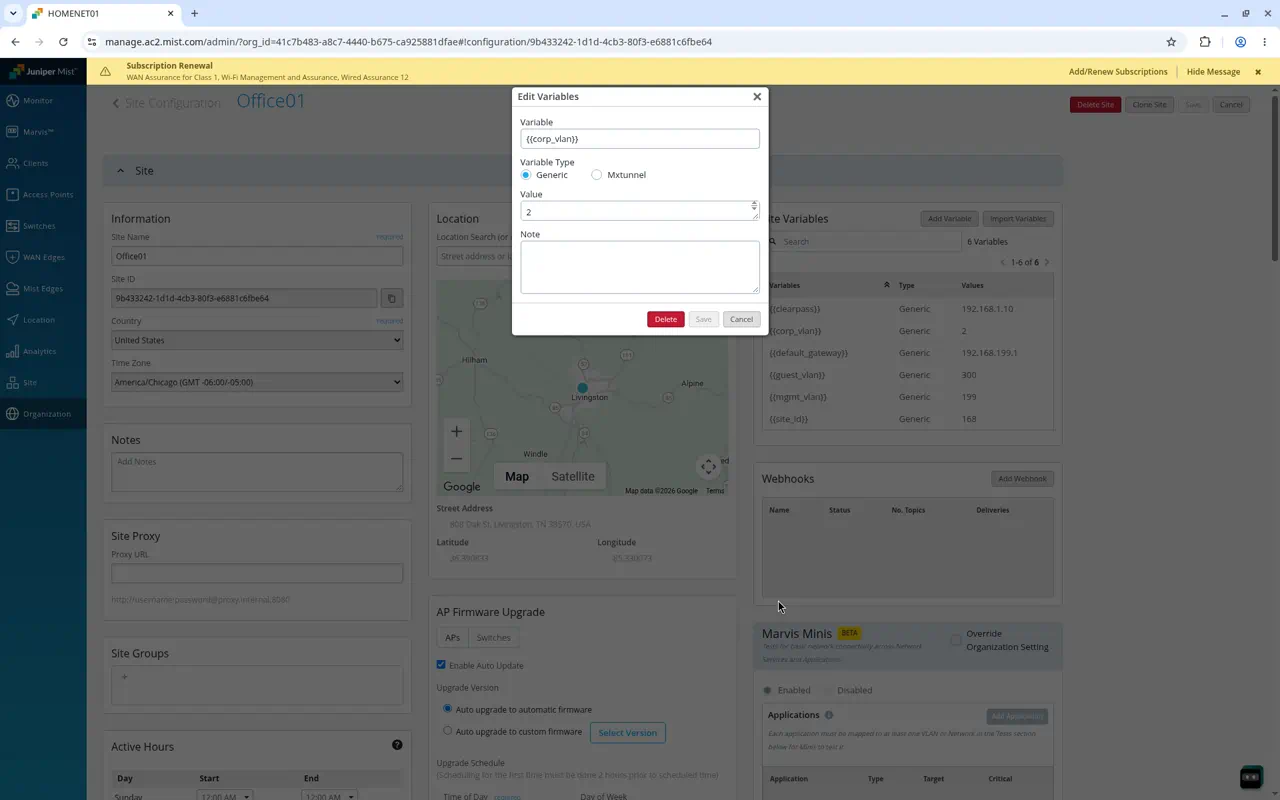
Click Save on the variable dialog, then click the top-right Save on the Site Configuration page. Juniper notes that variables listed in the section are not committed until that top-right Save.
Step 3: Export / import so you do not rebuild by hand
You can export and import variables so every site starts from the same name set.
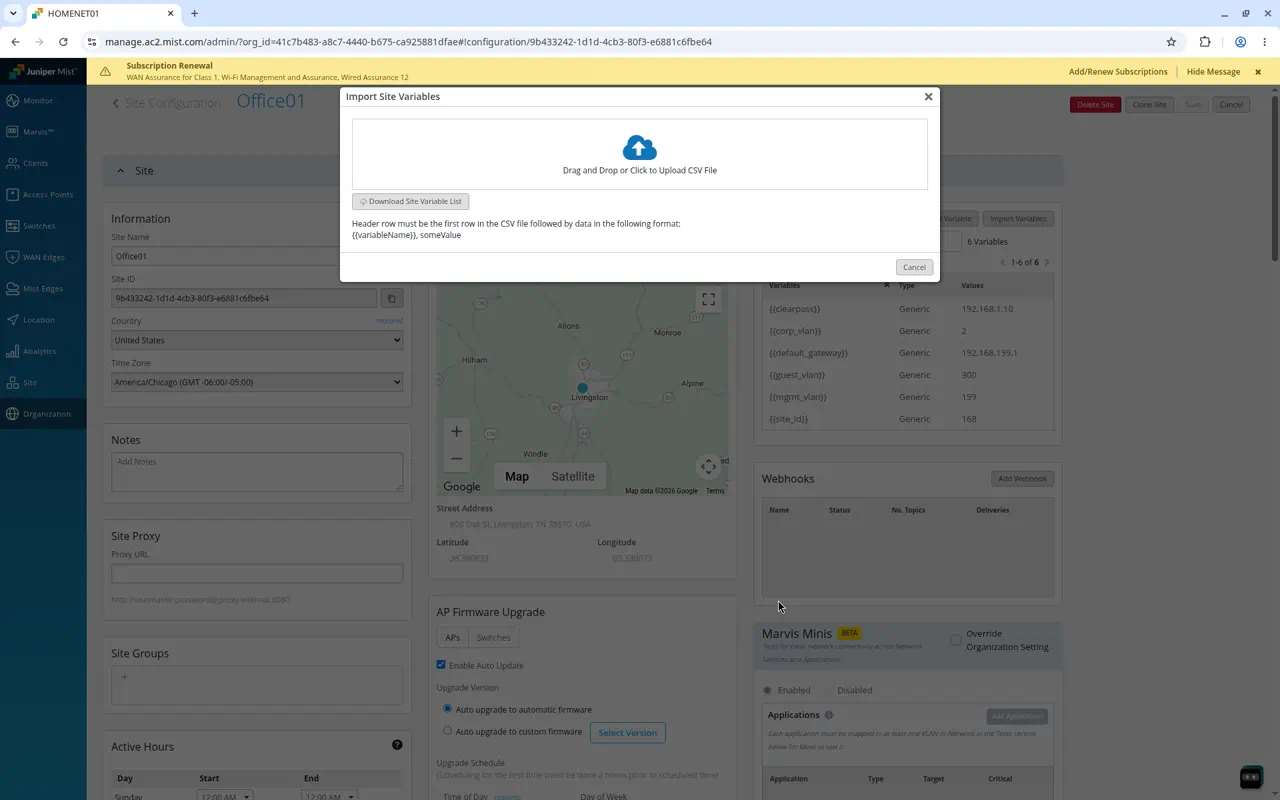
- In Site Variables, use Import Variables.
- Download Site Variable List to get the CSV.
- Add new rows at the bottom (first column:
{{name}}, second: value). Letters, numbers, underscores only in the name. - Upload the CSV and Save.
Existing names in the file are ignored on upload so you do not clobber live values—confirm the import summary Mist shows. Details: Configure Site Variables.
Wireless: one WLAN template, VLAN as a variable
Shared SSIDs are the usual wireless case. Keep radio, security, and roaming settings in one WLAN template. Let the VLAN change per site (or per AP group) via a variable.
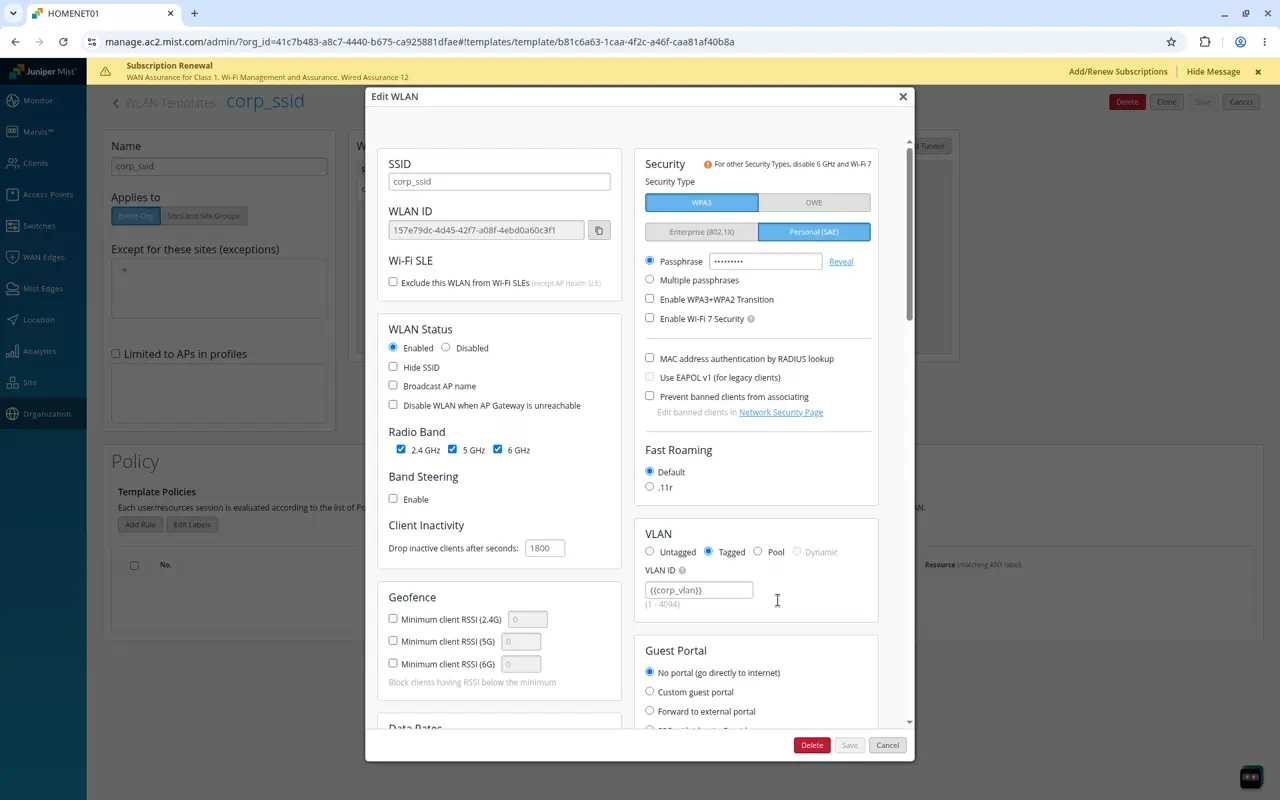
Step 4: Reference {{corp_vlan}} in the WLAN
- Open Organization → Wireless → WLAN Templates.
- Open the shared WLAN template, then edit the WLAN for the shared SSID.
- On the VLAN field, confirm you are in a field that accepts variables, then enter:
{{corp_vlan}}- Leave the rest of the WLAN settings in the template—do not fork a second WLAN template just to change VLAN.
Site A resolves {{corp_vlan}} to one ID. Site B resolves it to another. Same template object. Same later edits for timeouts or radio settings.
Wired: switch template (strongest use)
Switch templates are where variables earn their keep. Mist’s wired model is hierarchical: organization template → site → device (template overview). Prefer variables over site overrides when the shape of the config is shared and only the values differ.
Step 5: Build L3 values from site_id and gateway variables
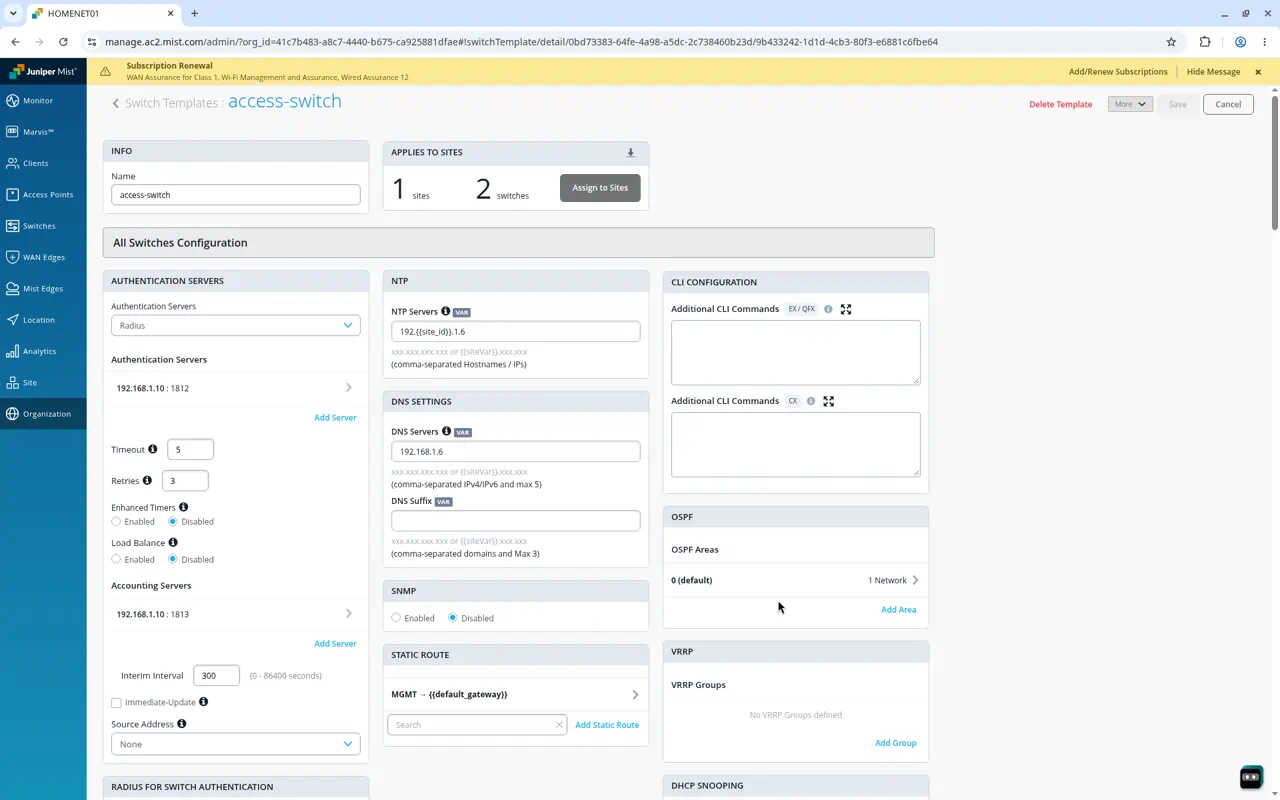
In the switch template, use composed addresses and gateway variables instead of hard-coding per site. Examples that stay in one template:
192.{{site_id}}.1.6{{default_gateway}}10.{{site_id}}.{{mgmt_vlan}}.1| Pattern | What it solves |
|---|---|
192.{{site_id}}.1.6 | NTP (or similar) that embeds the site octet |
{{default_gateway}} | Static route next hop that differs per site |
10.{{site_id}}.{{mgmt_vlan}}.1 | Fully composed management gateway |
Same template. Same port profiles. Different resolved addresses.
Step 6: DNS and NTP fields with the VAR badge
Open the switch template and find NTP Servers / DNS Servers. Both show the VAR badge when variables are allowed. Put tokens (or mixed literals + tokens) there, and keep the rest of the template shared.
Step 7 (optional): switch-level variables
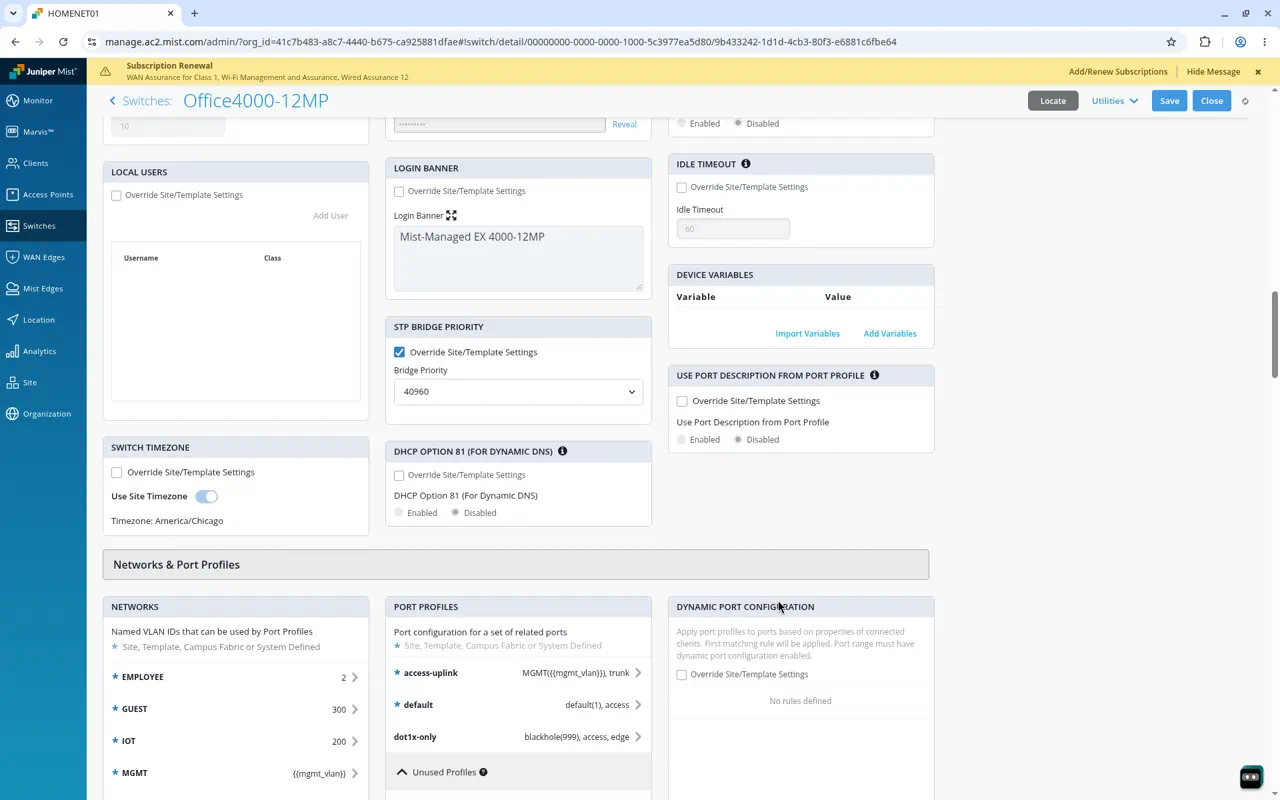
When two switches at the same site need different values under one template, open the switch → Management → Device Variables. Syntax is the same {{variable_name}}. If a device variable and a site variable share a name, the device variable wins. Procedure: Configure Switch-Level Variables.
Inside a site: device-profile variables
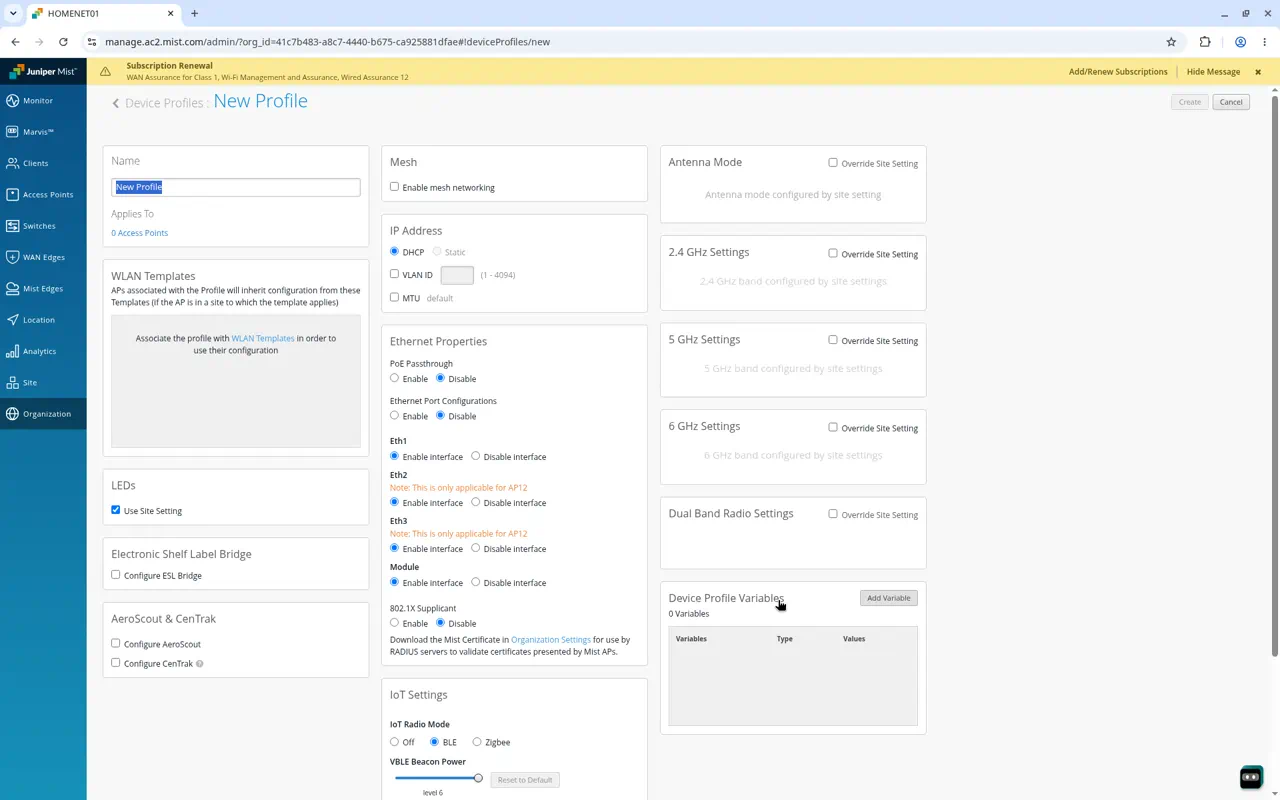
Sometimes the split is not site-vs-site. Clinical wing vs lobby APs can share an SSID and still need different VLANs. Define variables on the device profile, reference them from the WLAN template, and attach the profile to the right AP group. See Variables in Device Profiles.
The Variables section lives on the device profile form (Add Variable). Use it when you need AP-group differences inside one site while the WLAN template stays shared.
Precedence
Highest wins:
- AP (device) variable
- Device profile variable
- Site variable
Set the most specific layer you need. Do not define the same name at every layer “just in case.”
Validation checklist
- Site Configuration → variables saved with top-right Save.
- Every token in templates sits in a VAR-capable field (no literal
{{...}}left in non-VAR fields). - Case matches exactly across sites (
{{corp_vlan}}everywhere, not mixed case). - Spot-check one AP and one switch per site after apply (Mist UI + client VLAN / gateway as appropriate).
Practical takeaway
Templates are the contract. Variables are the fill-ins. Confirm VAR before you type {{anything}}. Keep names case-stable. Parameterize VLANs, site IDs, gateways, DNS, and NTP—not fields that only accept literals. Export/import the variable name set as you add sites. Do that, and one switch template plus one WLAN template can serve the rollout without turning into a museum of site forks.